Welcome to the exhilarating world of virtual reality with the Oculus Quest 2! Whether you’re a seasoned VR enthusiast or a newcomer eager to explore this immersive technology, getting started with your Oculus Quest 2 is essential for an unforgettable experience. In this guide, we’ll walk you through every step of the setup process, from unboxing your headset to connecting it to Wi-Fi and navigating the Oculus app for enhanced functionality. We’ll also highlight essential accessories to take your VR experience to new heights and provide solutions for common setup issues. Get ready to dive into a realm of endless possibilities as we help you set up your Oculus Quest 2 for a seamless adventure!
Unboxing Your Oculus Quest 2: What’s Inside The Box?
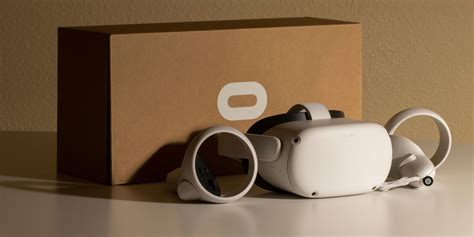
Unboxing your Oculus Quest 2 setup is an exciting first step towards immersing yourself in virtual reality. The packaging is designed to be both practical and visually appealing, offering a glimpse of what’s to come. Here’s what you can expect to find inside the box:
- Oculus Quest 2 Headset: The centerpiece of your setup, the headset is lightweight and comfortable, equipped with advanced optics and displays for an enhanced VR experience.
- Controllers: Two Touch controllers are included, allowing you to interact naturally with the VR environment. Each controller features intuitive buttons and triggers.
- Charging Cable: A USB-C charging cable is provided to keep your headset powered up, ensuring you can dive into VR whenever you want.
- Power Adapter: This adapter connects to the charging cable to charge your headset efficiently.
- Eyeglass Spacer: If you wear glasses, this spacer allows for a better fit, ensuring comfort during your VR sessions.
- Printed Quick Start Guide: This guide offers essential information on setting up your headset and getting started with the Oculus Quest 2 setup.
- Safety Information: Guidelines and tips to ensure a safe and enjoyable VR experience.
As you unpack these components, take a moment to familiarize yourself with each item. Proper understanding of the contents will help streamline the setup process and ensure you’re ready to enjoy your virtual reality experiences fully.
Step-By-Step Oculus Quest 2 Setup Process
Setting up your Oculus Quest 2 is a straightforward process that ensures you enjoy the best virtual reality experience. Follow these steps for a seamless Oculus Quest 2 setup:
- Power On the Quest 2: Press and hold the power button located on the side of the headset until you see the Oculus logo.
- Select Your Language: Once the headset powers up, select your preferred language using the touch controllers.
- Pair Your Controllers: Follow the on-screen instructions to pair your controllers. This usually requires pressing and holding the Oculus and the Menu button on each controller.
- Create or Log Into Your Oculus Account: You will be prompted to either create a new Oculus account or log into an existing one to access the Oculus platform.
- Set Up Your Play Area: The system will guide you through defining your play area. You can set it up by either using the Guardian system for a room-scale experience or a stationary setup.
- Sync Your Oculus App: Ensure you have the Oculus app on your smartphone to complete the setup. The app will guide you in syncing your headset and adjusting settings.
- Software Updates: Check for any software updates to ensure that your headset is running the latest version, which can enhance performance and fix bugs.
- Privacy Settings: Review and adjust your privacy settings within the headset and the mobile app as per your comfort level.
- Explore Orientation: Once setup is complete, take a moment to run through the orientation tour provided, which helps you familiarize yourself with the main features of the Oculus Quest 2.
By following these steps, you will have your Oculus Quest 2 setup completed quickly and efficiently, preparing you for an immersive virtual reality adventure.
Connecting The Oculus Quest 2 To Your Wi-Fi Network
One of the key components of a successful Oculus Quest 2 setup is establishing a reliable Wi-Fi connection. A strong network is essential for accessing the full potential of your VR experience, allowing you to download games, updates, and enjoy online multiplayer functionalities. Here’s how to connect your Oculus Quest 2 to your Wi-Fi network:
- Power on the headset: Put on your Oculus Quest 2 and wait for the main menu to appear.
- Open the Settings: From the menu, navigate to the Settings icon represented by a gear symbol.
- Select Wi-Fi: In the settings menu, find and tap on the Wi-Fi option to view available networks.
- Choose your Network: Look for your home Wi-Fi network from the list. If it doesn’t appear, press ‘Rescan’ to refresh the available networks.
- Enter your Password: Once you’ve selected your network, a prompt will require you to enter your Wi-Fi password. Carefully input the password using the on-screen keyboard.
- Connect: After entering your password, select Connect. The Oculus Quest 2 will attempt to connect to your Wi-Fi network.
- Check Connection: Once connected, you should see a checkmark next to your network name, indicating a successful connection. You may also want to test the connection by using the browsing capabilities.
With your Oculus Quest 2 successfully connected to Wi-Fi, you can experience the full range of content it offers. This connection ensures you can quickly download the latest games and patches, participate in social VR experiences, and stream content without interruptions. Consider optimizing your Wi-Fi setup by placing your router within good range of your VR space for the best performance.
The Oculus app is an essential component of your Oculus Quest 2 setup, providing a user-friendly interface to manage your VR experience effectively. Once you’ve completed the initial hardware setup, launching the app allows you to access a range of features that enhance functionality and personalization.
Here are key features of the Oculus app that can help you maximize your VR experience:
- Account Management: Ensure you’re signed into your Oculus account for a seamless experience. From the app, you can manage your profile and purchase new apps or games.
- Library Access: The app provides a convenient way to view and manage your installed games and applications, allowing you to launch them directly from your phone.
- Settings and Customization: Adjust your headset settings, including comfort settings, privacy options, and guardian boundaries, right from the app.
- Social Features: Connect with friends, see who’s online, and invite them to join you in multiplayer games or experiences.
- Software Updates: Keep your headset updated with the latest features and security patches through the app, ensuring an optimal VR experience.
By using the Oculus app effectively, you can significantly enhance your Oculus Quest 2 setup and enjoy all the wonderful content that virtual reality offers. Don’t forget to explore all the settings and features the app has to offer; there’s a lot that can elevate your VR experience!
Essential Accessories To Enhance Your Oculus Quest 2 Experience
To truly maximize your Oculus Quest 2 setup, consider investing in some essential accessories that can elevate your virtual reality experience. Here, we outline a list of must-have items that could help you unlock the full potential of your headset.
- Elite Strap: The Elite Strap provides extra support and comfort during extended gaming sessions. It features an adjustable design that ensures the headset fits securely on your head.
- VR Lens Protector: Protect your lenses from scratches and dust with a lens protector. This accessory is especially useful if you plan to share your headset with others.
- Carrying Case: A sturdy carrying case will help you securely transport your Oculus Quest 2 and its accessories while keeping them protected from damage.
- External Battery Pack: Prolong your VR sessions with an external battery pack. It provides additional power and extends your playtime without interruptions.
- Prescription Lens Insert: For those who wear glasses, prescription lens inserts can enhance comfort and offer a clearer view, making your Oculus Quest 2 setup more enjoyable.
- VR Gloves: For a more immersive experience, consider VR gloves that allow for enhanced interaction within virtual environments.
- Face Cover Replacement: A soft and comfortable face cover replacement can enhance your comfort, especially during long gaming sessions. Look for covers that are easily washable.
Investing in these accessories can significantly enhance your VR experience, ensuring that your Oculus Quest 2 setup is both comfortable and efficient, allowing you to fully immerse yourself in the VR worlds you explore.
Troubleshooting Common Issues During Oculus Quest 2 Setup
Setting up your Oculus Quest 2 should be a straightforward process, but sometimes you may encounter hurdles along the way. Here are some common issues you might face during the Oculus Quest 2 setup and tips on how to resolve them:
- Pairing Issues: If your headset isn’t pairing with the Oculus app, ensure Bluetooth is enabled on your smartphone. Restart both the headset and the app to see if that resolves the issue.
- Wi-Fi Connection Drops: If the headset keeps disconnecting from Wi-Fi, check your router settings. Ensure that your network has a strong signal and that the headset is within range. You may also want to restart your router.
- Software Update Problems: If you’re having trouble updating the Oculus software, make sure you’re connected to a stable Wi-Fi network. If the update fails, try restarting the headset and app and attempt the update again.
- Unresponsive Controllers: If one or both controllers are not responding, replace the batteries and ensure they are properly inserted. Restart the headset to re-sync the controllers.
- Visual Distortion: If you experience visual issues, such as blurriness, try adjusting the lenses inside the headset. Ensure the headset is sitting comfortably and properly on your face.
- Error Messages: If an error message appears during setup, refer to the official Oculus support page for specific error codes and recommended solutions.
By addressing these common issues, you can help ensure a smooth and enjoyable Oculus Quest 2 setup experience. If problems persist, reaching out to Oculus support may be necessary for more in-depth troubleshooting.
Frequently Asked Questions
What is the first step to setting up the Oculus Quest 2?
The first step is to unbox the headset and ensure all components, including the headset, controllers, charging cable, and power adapter, are present.
How do I charge my Oculus Quest 2 headset?
Connect the USB-C cable to the headset and plug the other end into a power outlet using the power adapter to charge your Oculus Quest 2.
What do I need to do before wearing the VR headset?
Before wearing the headset, adjust the straps for a snug fit and ensure the lenses are clean for optimal visibility.
How can I set up my guardian boundary in the Oculus Quest 2?
To set up your guardian boundary, put on the headset, navigate to the settings, and follow the prompts to outline your play area using your controller.
Is there a way to connect the Oculus Quest 2 to a PC?
Yes, you can connect the Oculus Quest 2 to a PC using a USB-C cable or via Air Link if your PC supports it, allowing you to play PC VR titles.
What should I do if I experience discomfort while using the headset?
If you experience discomfort, take a break, adjust the fit of the headset, and consider changing the IPD settings in the device’s settings menu.
How can I enhance the audio experience on my Oculus Quest 2?
You can enhance the audio experience by using quality headphones with the headphone jack or the Oculus Link feature to utilize audio from your PC.


